
UPDATE: I’ve found slightly less opaque instructions and gotten the InsaneBump plugin working for GIMP (and also the fully InsaneBump program working, but it’s really old).
I’ll start a new post because I’ve since found yet another tool for quickly generating different kinds of maps for texturing, Knald.
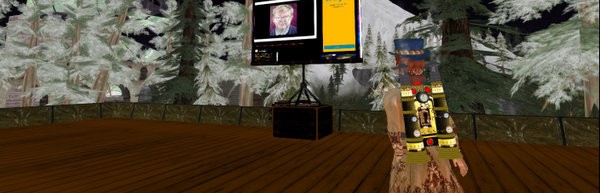
This might be worth installing the Materials Viewer to test in a SSB-enabled region. I’m usually well behind the curve on changes with Second Life updates and enhancements – see recent posts about trying to learn Blender years after sculpts (and later mesh) were introduced. But the Materials project, which I’ve been folllowing via blogs like Nalates‘ and others, really seems like a game-changer (heh) and people who like to make stuff for fun or virtual profit might need to step up their skillz a bit.
GIMP Plugin Registry – Insane Bump (based on Insane Bump, a free alternative to Crazy Bump)
This is a normal map generator from a single image, originally created by omaremad. Load a single layer picture, then choose filters/map/insanebump…, tweak the details, then hit OK. The normal/height/ambient/specular maps for the picture will be created within the folder where the original picture resides.
via Insane Bump | GIMP Plugin Registry.
It’s recently updated (May 2013) and it’s for GIMP 2.8, and it’s based on a free alternative to Crazy Bump, which costs $99USD for a personal license. Crazy Bump is demoed in this video that Nalates featured in a preview of the coming Materials project for Second Life that uses Server Side Baking.
The process for generating 3 or 4 additional textures/materials in GIMP is pretty tedious, and I think it can also be done in Blender, but the learning curve there is steep. This might be really useful for Second Life texture artists, and other texture artists in the gaming community.
It looks good, but it doesn’t work. See below, I’m hoping that a fix will be posted or found.

Prim Perfect’s been following the Materials Project with the Designing Worlds show
There’s also a couple of “normal” normal map GIMP plugins, an old one from 2008 and a newer one that references GIMP 2.8 but is a little harder to install. I’ll try both with some default texures after getting the Materials Viewer installed.
This is a plugin for GIMP version 2.8.x. It allows you to convert images into RGB normal maps for use in per-pixel lighting applications. The goal is to completely clone NVIDIA’s photoshop plugin, with a few new useful features.
FeaturesFilters. These include the filters found in the NVIDIA plugin (4 sample, 3×3, 5×5, 7×7 and 9×9) with the addition of 3×3 and 5×5 Sobel and Prewitt edge detection filters (yields the best results IMO).
Post-filtering normal scaling
Wrap mode. This allows the filters to wrap around the image. Useful for creating normalmaps from a tiling bumpmap.
Height source. Use an average of the RGB components or the alpha channel as the height source in the generation of the normals.
Alpha result. For RGBA images, the alpha channel can either remain unchanged, have the height used to generate the normal written to it, inverse height, be replaced by either 0 or 1, the inverse of the alpha channel’s current value or use the value of a grayscale image.
Conversion options including “Normalize only” for renormalizing bumpmaps.
“Convert to height” conversion option to reclaim height maps from normal maps (use in tandem with the Invert X and Invert Y options).
DU/DV map creation (8 and 16 bit, signed or unsigned)
Dynamic 2D preview in the interactive dialog.
Dynamic 3D preview window using OpenGL to view the normal map applied to a lit 3D mesh. Here are some of it’s features:
View normal map applied to a number of 3D meshes (quad, cube, sphere, torus and teapot)
Shading is done with a number of bump mapping techniques (dot3, parallax, parallax occlusion and relief mapping) using the OpenGL Shading Language (GLSL)
Full scene navigation controls (Rotate the object, light or scene)
Fullscreen viewing support
Specular lighting toggle with exponent slider
Ability to choose ambient, diffuse and specular light colors
UV coordinate scaling
I got Normalmap working just fine, no problems. But eeeeeesh, InsaneBump is a Python script, it’s a little more involved to get it working. I checked check how to install Python plugins and it still isn’t working. I think the original poster left in calls to programs or plugins that aren’t standard installs, and it seems to be calling for ImageMagic to be installed in the C:/ directory.
I found a separate page with an OP calling for a step-by-step process to get it working on her 32-bit system, and of course, no step-by-step, just a confusing conversation between the original plugin poster and a helpful person who posted pretty technical fixes that I didn’t understand.
01. I have searched and read all the general help items relating to the installation of plugins on a Windows XP platform. I have placed the InsaneBump.txt file in the proper directory, correctly changing its file type suffix to .py.
02. Gimp (2.8.4) launches and appears to run correctly in all respects. The menu hierarchy Filters>Maps however does not expose a plugin named InsaneBump. What is exposed is named BumpMap and does not, as far as I can tell, provide the functionality that you have supposedly ported from the original standalone program posted by Omar.
03. So, please bear with me. The Messie-posted instructions concerning installation are extremely terse, which may be appropriate if you assume that all users are not only long-time GIMP users, but probably Python developers. For someone who is not in that category, but would really like to be able to use your valuable plugin, please provide precise instructions which, if necessary, but I cannot tell, may involve a prerequisite requirement to install any other Python libraries and/or tools which are not installed by a fresh install of GIMP 2.4 itself, I will need to download and install in order to successfully access your code.
To be clear, I would like instructions that have nothing to do with Linux, nothing to do with 64-bit versions of Windows, just the correct steps for a long-lived, very solid 32-bit windows environment on which Python development does not take place, so no assumptions concerning anything not installed by GIMP will succeed.
Thank you.
Polite, firm, and yet carrying a big stick ready to thump anyone that doesn’t give a clear, non-technical answer. They’re still using Win XP and GIMP 2.4, so I wish them luck. The answer that came back was no help, it was something about fixing indents. My in-house geek looked at it and said “I hate Python,” then tried to install the missing stuff. Then we looked at it not working for a while, and decided it was a good time to get some lunch. So we went and got something to eat.
Please, can’t somebody just fix the plugin so that it installs itself rather than editing files and so on?
I’ve tried editing it, my in-house geek attempted to edit it, we installed ImageMagick (I seem to remember that’s a really old program) and made sure that the other program – “vinvert” or something – was already installed in 2.8. I’ll try rebooting, and as a last resort, check back at the plugins page and the “step-by-step” page to see if there’s been any update.
I’m not sure if this is a spam comment or not… but the best community forum for Second Life users covering a really broad range of interests in Second Life is probably http://www.SLUniverse.com
Gracias, este no es un blog de modo en realidad, per en el communidad de Second Life (La Vida Segunda).
Me gusta mucho los vestidos en su blog!